

The first time I tried to wear a lace-up ankle brace inside a soccer cleat, I lasted about four minutes. I sat down on the grass mid-game, pulled the whole thing off, and shoved it in my bag. Too bulky. The laces were biting into the top of my foot. My heel slid around inside the brace every time I planted, which is a particular and unpleasant feeling when you are trying to turn on a soft field in October.
That was roughly six years ago, a few months after I rolled my right ankle badly enough that I heard it as much as I felt it. When my physical therapist cleared me to go back to playing, I told her I wanted more than a slip-on sleeve. She was the one who suggested a lace-up brace, and I ended up in the Med Spec ASO Ankle Stabilizer, size Large, the nylon lace-up with the figure-8 straps. I have worn one on that right ankle for every Sunday league game since, plus most Wednesday pickup nights on turf. I am on my second one. The first gave out after about three years of weekly use, and it gave out the way you would expect: the straps stopped holding tension and the whole thing went soft.
Six years on the same right ankle. Same brace.
The Med Spec ASO Ankle Stabilizer, size Large. Nylon, lace-up closure, figure-8 straps. It fits inside a cleat, which is the only reason I still wear it at 48 instead of taping my ankle like I did in my twenties.
Amazon Check Today's Price on Amazon →How to Put It On, Step by Step
What follows is the order that finally worked for me, arrived at the way most of my gear knowledge gets arrived at: by getting it wrong for two seasons first, usually while running late. None of this is medical advice. It is a description of how I get a brace, a grip sock, a team sock, a shin guard, and a cleat onto one foot in a parking lot in under three minutes.
Step 1: Start With a Dry Foot and Put the Brace On Before Your Sock
Nylon slides on damp skin. If you have driven to the field in the San Antonio heat, or you are putting this on at halftime, wipe your foot and ankle down with a towel first. A dry foot means the brace stays where you put it instead of creeping down your heel after ten minutes of jogging. This sounds like a small thing. It is not a small thing.
The order matters more than anything else in this guide. Brace directly on the foot, then your sock over the top. I know people who put the sock on first and then wrestle the brace over it, and every one of them has a lump of bunched fabric under their arch by the twentieth minute. The brace needs to be against your foot to do its job.
These days I am wearing more layers than I used to: brace on the skin, then a grip sock, then my team sock over that. It is a stack, and it takes a minute to get used to. One practical note. My cleats are a half size larger than the size I would buy if I were playing barefoot, because a lace-up brace is real material and that material has to live somewhere inside the shoe.
Step 2: Lace It Snug Through the Middle, Not Tight at the Top
Lace it like a shoe, bottom eyelets first, working up. The mistake almost everybody makes is over-tightening the top two eyelets, because that is where you feel the most secure right after you tie it. That is also where the biting comes from. By the second half you will be aware of nothing but the top of your foot.
Pull it firm across the midfoot and the instep, then ease off as you get toward the top. The brace should feel like a firm handshake across the middle of your foot, not a clamp. If your toes start to tingle while you are still standing in the parking lot, undo it and start over. Tingling is not a sign that it is working.
Step 3: Wrap the Figure-8 Straps Like You Mean It
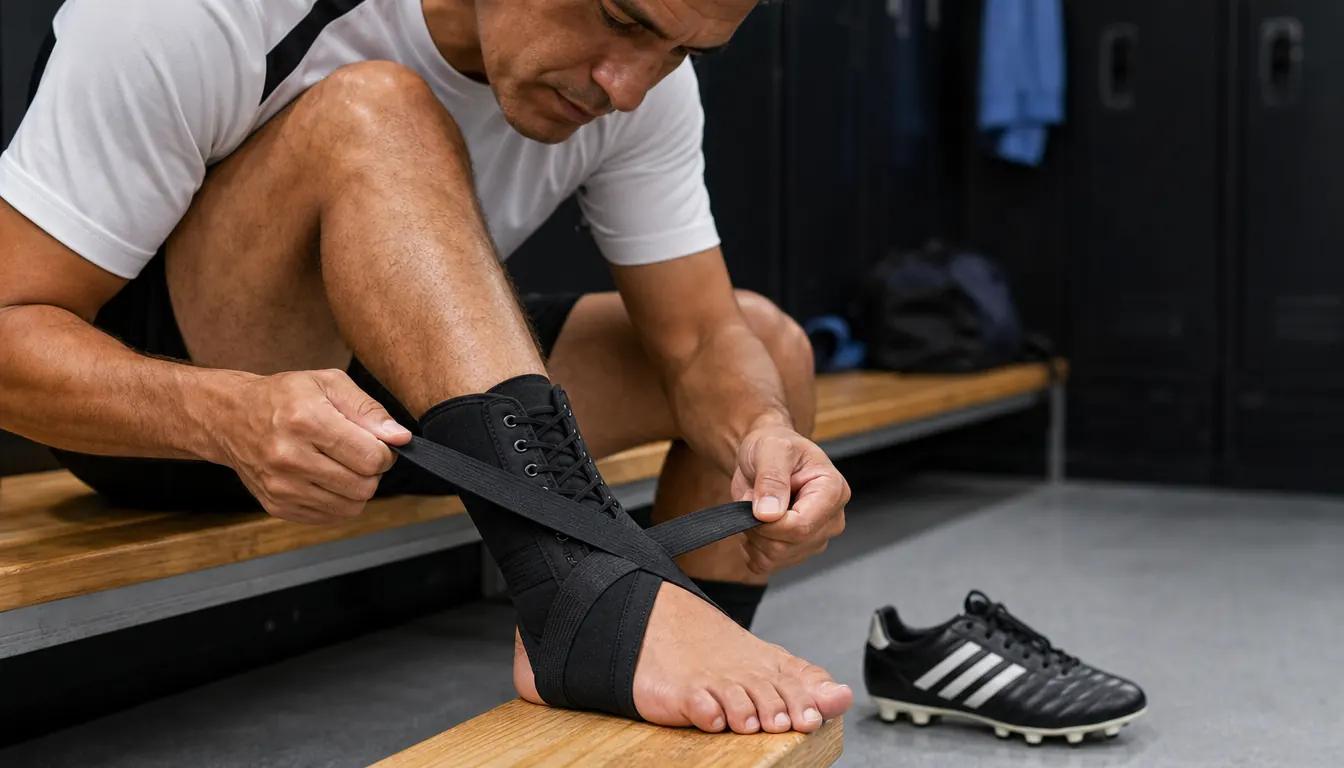
The straps are the whole point of this design, and they are the part most people rush. Sit down, put your foot flat on the ground with your ankle at about a right angle, and take your time. The straps should cross over your instep and wrap around the back of your heel in a figure-8.
The thing I got wrong for a long time: I was squeezing the straps around my ankle instead of pulling my heel back into the pocket of the brace. The goal is to seat the heel, not to crush the joint. When I wrap them correctly, I can feel my heel settle into the back of the brace and the whole thing stops sliding around inside my shoe.
Snug, then one more notch. Not as tight as you can get it. If the straps leave deep marks on your skin after ninety minutes, you had them too tight, and you will feel it on the drive home.
Step 4: Check the Heel Before the Cleat Goes On
Stand up and put your weight on it while you are still barefoot or in socks. Your heel should feel cupped at the back, not floating. Rock side to side a couple of times. If the brace rotates around your ankle when you shift weight, the straps are not doing their job yet and you should re-wrap before you add the shoe.
Then the cleat. The listing gives the brace a 2 inch thickness, and that is real material that has to fit inside your shoe, so this is the moment where you find out whether your cleats are big enough. If you have to force the shoe on, the brace is going to fight you for ninety minutes. Loosen the laces all the way down before you push your foot in, then re-lace from the bottom.
Step 5: Re-check Everything After the Warm-Up
Ten minutes of jogging and light passing, and everything settles. The stack compresses, the sock stretches, the straps find their real position. I check mine after the warm-up and again at halftime, and I have never once checked it and found it perfect. It usually needs one small adjustment at the top or a re-tie.
This is also the honest part. My Med Spec ASO does not make my ankle new, and I would not tell you it does. What it does is let me stop thinking about my right ankle for ninety minutes. At 48, playing center midfield against guys ten years younger, that is worth the two minutes it takes in the parking lot.
What Else Helps
The brace is one piece of a system, and I want to be clear about which job each piece does, because I have seen people try to solve an ankle problem with a calf sleeve and wonder why nothing changed. The brace supports my right ankle. The Rymora calf compression sleeves I bought about 18 months ago are for my tight calves, which flare up on the turf Wednesday game. Those are two different problems and two different products. For me, the sleeves help me warm up and get through the turf night without my calves seizing, and that is all I ask of them.
The Yufree grip socks are the piece I did not know I needed. My feet were sliding inside my cleats on the turf, and a sliding foot drags the brace with it, which undoes everything you did in Step 3. The grip socks stop that slide. I wear them under my team socks, which I cut down so they sit over the grip socks instead of fighting them. My son Gabe took one of the four pairs, so I am down to three.
For the shin, the Franklin Sports Superlight slip-in guards are what has been in my bag for about two years, since the old hard-shell pair cracked across the shield. And after the game, the TriggerPoint GRID roller in the corner of my garage gets ten minutes on my calves, hamstrings, and quads on Monday morning. None of that touches the ankle. It just means I show up Sunday able to move, which is the whole game at my age. Anything that actually hurts, and I mean hurts rather than feels tight, goes to a doctor or my physical therapist. I have done that once and I would do it again without hesitating.
I have worn an ASO on the same right ankle for every game for six years, and I am on my second one because the first wore out, not because I went looking for something better.

Sizing, and What the Listing Will Not Tell You
I wear a size Large. That is the size in the title of the product I actually order, not a size I worked out from a chart. If you are between sizes, go with the larger one, because a brace that is too small will fight your foot and you will not wear it, and a brace you do not wear is not doing anything for you. The listing carries more than 32,000 ratings at 4.4 stars, which tells you it is a common choice among people with the same problem, and it also tells you it is not a perfect product for everyone.
The warranty is listed at 6 months limited. My first one lasted about three years of weekly use before the straps went soft, so I was a long way past that either way. What I would tell you is to check the straps every few months. When you pull them and they no longer snap back, that is your signal, and it is worth replacing before you find out mid-game.
What This Brace Is Not
It is not a substitute for rehab. I did the physical therapy, I did the boring exercises at home, and the brace is what I put on afterward to feel supported while I play. If you rolled your ankle two weeks ago and you are reading this looking for a way back onto the field this Sunday, the brace is not that. Go see somebody.
It is also not invisible. People will notice it, your sock will sit differently, and your cleat will feel tighter than it used to. For me, that trade was obvious: a slightly tighter left-right difference in how my shoes feel versus not playing. I will take the tight shoe every time, for as long as my legs let me keep lacing up on a Sunday morning.
Two minutes in the parking lot is the entire ritual
Brace on the skin, sock over it, straps seated around the heel, cleat laced from the bottom. That is the whole method. The Med Spec ASO Ankle Stabilizer in size Large has been on my right ankle for six years of Sunday league.
Amazon Check Today's Price on Amazon →